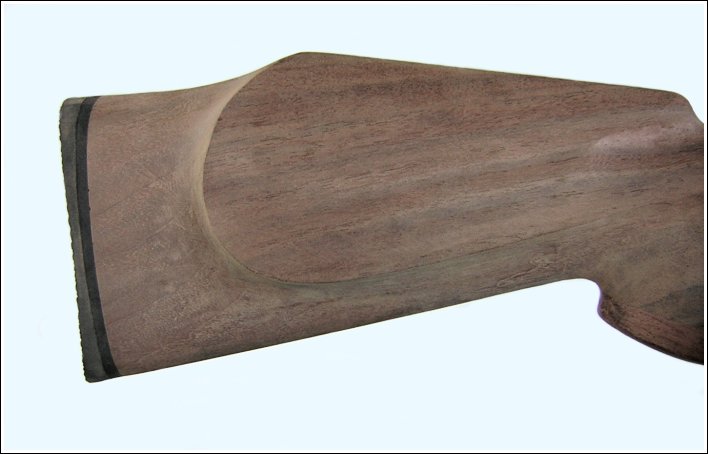
Custom Gunstock (semi-inletted)

This article shows what it takes to complete a custom gunstock into a masterpiece. I purchaced this stock directly from "Richards Micro-fit". It's a spectacular piece of "A" Grade walnut that came 96% inletted. I'm using it to build a left handed .270 Ruger M77 Mark II rifle for a friend. The next time he has a long wait in his deer stand, he'll have a great looking rifle to look at. This article shows the steps required to complete a semi-inletted stock.

Fitting and finishing a custom gunstock takes a lot of time, but it's always worth it. I've done similar stocks before, and every one has turned our real well. However, I'm definitely not the fastest craftsman around. The barreled action now slips into this stock, and it's a perfect fit. Most of the hard work is done, but this stock still has a long way to go. The next step is to block sand the flat surfaces perfectly flat, and make the edges straight and crisp.

One of the best tools I've found for removing excess wood and shaping a stock, is to use a Dremel Tool using a special burr like this one. Any burr of this type will to the job quickly, and with good control.

I ordered this stock exactly the way I wanted it, but it arrived with some different features. I ordered it with NO sling swivels installed and NO white spacers anywhere. As you can see, they were both included. I was also surprised to see the "length of pull" on this stock was well over 14". That's a bit too long for most shooters, but it can also be fixed.

After coarse sanding this stock, it's starting to take shape. I replaced the original recoil pad with a 1/2" Pachmayr pad, because I'm no fan of white spacers. I also had to shorten the stock just a bit, to make the length of pull a more reasonable 13 1/2" long. Both of the sling swivels are installed a little too far to the rear (but not too bad), and I decided not to relocate them.
Fitting a recoil pad or a rifle pad is far from being one of my favorite projects, but sometimes it just has to be done. I use a recoil pad jig made by B-Square, and it makes the job a lot easier. I use a bench sander with an 80 Grit belt to reduce the size of the pad. Then I switch to a 220 grit belt, until the white chalk line is almost gone. Then I install the rifle pad, and do fhe final fitting with a bench disk sander using a 320 grit disk. This leaves a very smooth finish on the sides of the pad, and the fit becomes perfectly flush with the wood.

Notice the thin white chalk line under the rifle pad. This makes
it a bit easier to see where to sand the rifle pad to size. This scribed line was made after temporarily attaching the pad, and using the point of a finishing
nail to trace the stock. The white was added by running a piece of chalk along the scribed line. The excess chalk powder was then rubbed off the
surface.
Whenever you put a screw into a recoil pad, it's a good idea to use a screwdriver with a round shaft. It's also important to
coat the screwdriver shaft (and the screw) with some type of grease. This avoids leaving rub marks on the rear of the pad. If this is done
correctly, there should be no visible trace where the screws are located.

The stock was quite rough, and it was very time consuming to cut the barrel channel and reshape the forearm. Notice the thin cutout for the barrel channel. This is definitely no project for an amateur.

At this point, this project has taken 18 hours. The next step is glass bedding, then I'll fine sand the stock and add a smooth finish.

I used (3) coats of Tung Oil Finish to seal the grain. Then I added (4) coats of wipe-on Polyurethane, semi gloss finish. Each coat of finish needs to be hand rubbed before adding the next coat. I allow three days for the finish to completely harden, and then, I polish it with Brownell's FFF polish. When it's done, I wax the stock with Imperial "Hand Glaze" made by 3M. That makes it feel very soft like an oil finish.

These stocks are very rough, and making them fit like a glove is no small project. You need to really enjoy woodworking, and be prepared to spend a lot of man hours just shaping and sanding.

Look at the inside of this stock after the initial bedding. This is
quite different compared to its original shape. I like to use Devcon "Putty" for the initial build up, and Devcon "Liquid" for the final bedding.
The final bedding is about to begin in this area, and in the tang area (behind the bolt). When this whole process is done properly, this rifle will be much more
accurate. At this point (after the initial bedding) I've put 21 hours into this stock.
This stock was completed in my spare time (after a few weeks). Unfortunatelty, I never did get a complete set of pictures of this finished
project. That's too bad, because it really turned into a beautiful rifle. The owner now lives in North Carolina.
